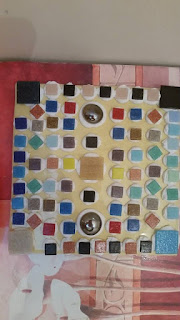
My own mosaic
Mosaic can be experimented with using paper at a young age. My first class made this group picture using mosaic (a ratio of 3:1 boys = Mindcraft obsession!)
Tiles can also be used with middle primary and senior primary level.
Firstly you will need a base tile. It doesn't matter what colour they are because they will be covered with grout. Just a plain left over tile will do.
The small tiles can be bought from a craft shop (Buy tiles here: http://corkartsupplies.com/Craft-Mosaic/), or you can buy bathroom tiles on a net and cut them/ steep them in boiling water and remove.
I just used the tiles at this size with primary school children. You can buy cutters, but I wouldn't let children do this- and make sure you wear safety glasses.
Remind the children that the edges of tiles may be sharp- and not to rummage around too heavily in the container of tiles.
You will need adhesive and grout in one. This can be bought as a mixture or pre-made.
Using spatulas, the children 'butter' the grout onto the small tiles and stick to the main tile.
Add buttons and beads for variety
Leave to dry for a day.
Cover the whole tile in the grout to fill all the gaps. Using a damp sponge, wipe off all excess.
Leave for another day.
Gently sand off any excess grout and polish the finished product.
I really like the work of an Irish artist, Dawn Aston (https://www.facebook.com/pages/Dawn-Aston-Art-and-Designs/138942572800775?sk=wall).
She runs workshops which I highly recommend!
I attended one in the Purple Raven Art Studio in Delvin, Co. Westmeath (https://www.facebook.com/pages/Purple-Raven-Art/132973726731506?fref=ts).


No comments:
Post a Comment