Powered By Blogger
Showing posts with label Scissors. Show all posts

Thursday, 28 April 2016

Pritt Glue Review

I was kindly gifted some Pritt glues to review. The children in my first class were so excited to see the parcel arrive to the school!


When I first began teaching I remember thinking I had found a great bargain in picking up some budget glue sticks; I quickly learned that you get what you pay for! Pritt is always great quality, as a teacher this is important, the last thing you want is to have to re-glue 25 pictures that are now hanging off the wall!

I began to think about the lesson I could use them in. The bag of Pritt glues reminded me of creating art as a child and the big craft sets I would get for Christmas and birthdays. As I was looking through the internet, my friend Aoife tagged me in an article.

http://nymag.com/scienceofus/2016/04/why-typical-preschool-crafts-are-a-total-waste-of-time.html

It is based on preschools, but really at 6 and 7 years old it definitely applies to my 1st class.

"Kids at this developmental stage benefit from messing around with paints, or clay, or crayons; they gain little, on the other hand, from assembling together some construction paper shapes that their teachers cut out ahead of time."

That was the lesson decided. I cleared a table at the top of the room and left out craft materials, including the Pritt glue. I loved this freedom as a child- no right or wrong, just process. 


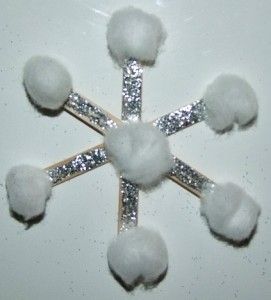
Included in the parcel were these glitter glues- these went down a treat! Less messy than glitter glue pens and dry much quicker.


These coloured glues were great to write with and the children enjoyed experimenting with these.


The squeezey pen was great to get the fine motor muscles working! 


I loved the total immersion in process!


This was a rainbow- you had to look into the cup to see it!

The coloured squares were scraps of paper left over from the pig races from the Heart of Ireland Festival! This boy figured that if he glued two pieces together it made a hat.


A favourite car was cut out- I was amazed at the cutting skills, the high interest subject definitely affected the engagement here.


A crown for the king! He also made a matching snake for around his neck- it was excellent!

Co-operative exploration of materials here. These boys decided to do group work and it was their own decision! 

The class really enjoyed the freedom today. They were so busy and focused on creating their own pieces. I have put a lot of energy into creativity with them and I was delighted that they were all just so happy to experiment without any reluctancy! The selection of materials really added to the lesson and the variety of glues brought a fun element to the creativity. 

Tuesday, 25 August 2015

"Winter"

Drawing


I came across this idea on Pinterest, it's a great example to begin shading and where light hits an object. 
You could develop this by drawing still life with light reflecting on one side- a bright winter's morning, or a safer bet in Ireland- a lamp!

Paint &Colour

Wax resist


Wax resist is such a handy lesson. I recommend using cheap, waxy crayons. Candles work really well too. Mix the paint with lots of water to ensure the wax resist is obvious.

Tones of Blue

Create tones of blue with white and black paint mixed with the blue.


This is another example of a painting found online, it's a brilliant extension to the tones of blue lesson.

Painting on Ice

http://www.education.com/activity/article/paint-with-ice/

This lesson is always referenced on early education/ preschool pages- but it's a great discovery learning lesson for primary school age also. A child in my first class tried to bring a snowball in to school in his pocket "for later"- this ended up being a great lesson in ice and melting!

There are two ways to approach this:
1. Freeze a mixture of paint and water in ice cube trays. Allow the children to paint with.
2. Freeze a larger volume of water (in a butter tub) and allow the children to paint on it. 

Splat Painting

A snowy background can be created in Jackson Pollock style! See previous posts for examples of how to explore;

http://clairesprimaryschoolart.blogspot.ie/2015/08/primary-colours.htmlChalk Drawings- dip the chalk in paint for some creative exploration!

http://clairesprimaryschoolart.blogspot.ie/2015/08/story-books-to-teach-children-about.htmlPrint
Snowmen

Negative space picture

I love the creativity in this!


Mix glue and shaving foam. It will dry as a 3-D foam. Very effective!

Clay

Penguins and snowmen are easily created from clay. Ensure to use scour and add a drop of water when sticking the snowmen together/adding beaks and noses!

Fabric & Fibre

Polar Bears are easily created from cotton wool. Tin foil works really well as a reflective background.


I came across this fantastic snowman online- and an eco friendly lesson too ;) 


Construction

Penguins and Snowmen


Another take on this is to stick the cotton wool on the outside to create fluffy snowmen.

Why not give the bottles and black and orange paper to the children and see what they create?! 


Snowflakes


Fold and cut paper to create individual snowflakes.

Explore the true story of Wilson 'Snowflake' Bently, a photographer of snowflakes.


An easier method of constructing a snowflake for younger years.


Snowflakes with lollipop sticks.

Snow Globes


https://www.pinterest.com/pin/506725395544563063/


Print

Using natural resources to print snowflakes


Experiment with different textures to create print effects. 

Winter books to respond to:

"Penguin"


"The Snowman"


Monday, 24 August 2015

Cutting Skills

Cutting Skills are also great for fine motor.

Children with additional learning needs may need altered scissors. These are available from thinkingtoys.ie
http://www.thinkingtoys.ie/fine-motor-skills---all/fine-scissors

Your class kit of scissors may have left-handed scissors in it. They overlap on the opposite side and are much easier for children who cut with their left hand. Sometimes they are the two colour ones (yellow and green).

Cutting skills can begin with fringes. Children can cut 'grass'. 


The next progression is curvy and zig zag lines.


When the children have mastered these, shapes that have curved and sharp edges will work well. 2-D shapes are good to use too, start with straight edge shapes- squares, rectangles, triangles and then introduce circles (these are tricky!). 

Encourage the children to turn the page as they cut. Maybe cutting a general line around the shape will work and then cutting the details.


Remind them to have smooth edges- not jagged. 

A 'Cutting Skills' copy is useful to stick the shapes in. It is also a good running record of their progress! 

Keep challenging them with harder shapes.


I found these pages on : http://www.activityvillage.co.uk/